The EFT form provides three sections for you to complete: Deposit Information, Banking Information, and Contact Information.
Be aware that in the Banking Information section, you can click the Info icon ![]() to display details about how to complete the associated field.
to display details about how to complete the associated field.
Note: The fields you complete in this form are associated with Payee Tax ID number (TIN) shown above the Payment Type field. If you have another TIN for which you want to authorize EFT payment, refer to the Help topic Re-registering After a TIN Change for more information.
To use the EFT form:
Starting with the Deposit Information section at the top, choose a Payment Type from the drop-down list.
Choose All Locations for my Payee Tax ID (TIN) to associate funds transfer with the displayed TIN.
Choose Clinic Address to associate funds transfer with your valid clinic address. Choosing this option will display another drop-down list, where you can select the address (or one of the addresses) associated with the TIN. If the correct address does not appear in the list (it may be inactive in the database), choose Other Address. A pop-up message will appear, informing you to contact your Professional Services network representative.
Note: After submitting your EFT data, you can go back and choose a different Payment Type. Refer to the Updating Electronic Funds Transfer Data topic for more information.
Mark the check box for "I am authorized to make the request ...". This affirms your approval for payment transfer.
Mark the check box for "I understand that an NPI is a HIPAA requirement ...". This affirms that you have a valid National Provider Identifier.
Note: The text entry fields for Authorized Approver Name and Telephone will be inactive until you mark the above check boxes.
Enter your name in the Authorized Approver Name field.
Enter your telephone number in the Telephone field—use the format xxx-xxx-xxxx.
Verify that the email address shown in the Authorized Approver Email field is correct. If it is not correct, we recommend you update the email by clicking the Edit Profile link, located toward the upper right corner of the application window. Be aware that when you change/update the email address in the Edit Profile screen, you must sign out of the application and then sign back into the application to see the updated email address.
Click the Submit button located toward the lower right corner. If you've completed the form properly, a verification screen will display similar to the example below, allowing you to review your data.
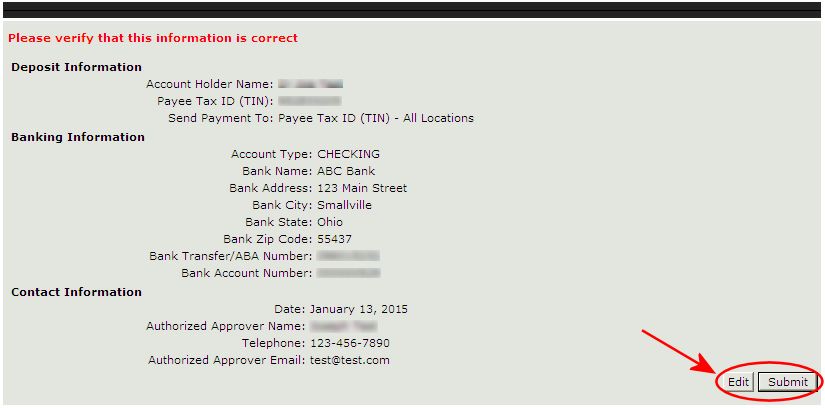
Do one of the following:
If you need to make a change, click Edit to return to the EFT form and modify your data.
If you are satisfied and ready to proceed, click Submit.
Note: If you exit the application before submitting your data, or the application times-out after 30 minutes of inactivity, you will have to start over again with the EFT form.
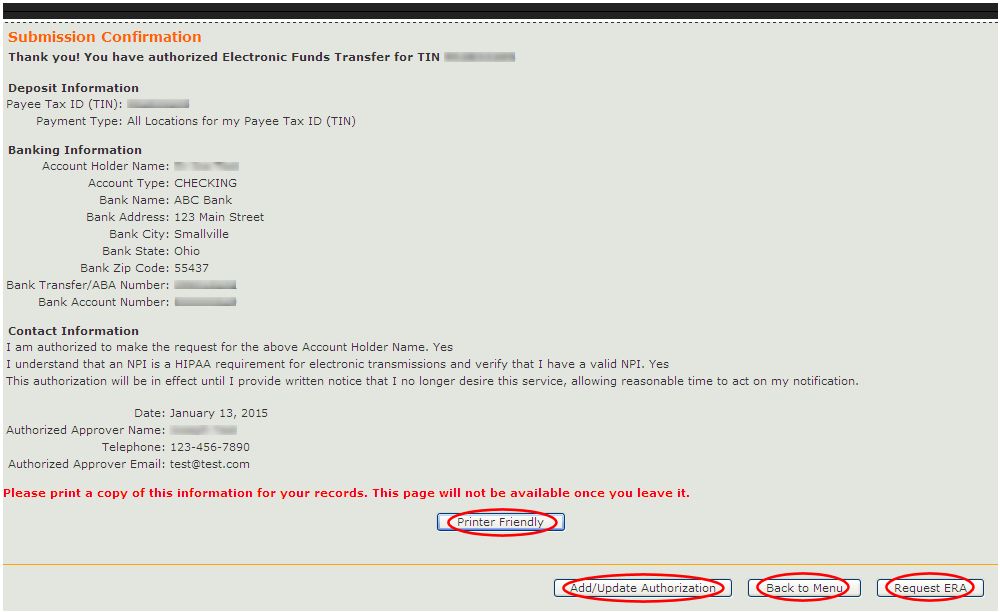
After submitting your EFT form data, the Submission Confirmation page will appear. To display a separate printer-friendly page of your data:
On this separate page, click the Print link to print the page, and then click the Close link to close the printer-friendly page and return to the Submission Confirmation page.
At this point, you can do the following:
Return to the main menu by clicking Back to Menu, - or -
Get set up for Electronic Remittance Advice by clicking the Request ERA button.
If you want to add or update information associated with what you've already submitted, click the Add/Update Authorization button located toward the bottom of the confirmation page, as shown above. This will display the Electronic Funds Transfer Updates screen, providing you with options for updating your data.
For more information on adding to or updating your EFT data, see the Updating Electronic Funds Transfer Data topic.
Accessing the Electronic Funds Transfer Form
Updating Electronic Funds Transfer Data
Accessing the Electronic Remittance Advice Form